
How I turned any picture reference into a Ingres drawing!
Experimenting and rediscovering the art and craft!

Let’s start learning!
We’re going to learn how to turn any picture reference into a Ingres drawing!
By following these basic step by step, we’ll learn what we’ll need and how to start using photo references and turning them into an Ingres portrait drawing.
You can watch the art tutorial video on YouTube for more details!
Art Materials
Here’s a list of Art materials you’ll need to sketch out this art tutorial together today.
Sketch paper: Strathmore Sketch paper, 9 x 12 inches
HB Pencil
Eraser and Kneadable eraser
Soft Synthetic Brush (If you’d like)
Step 00 - Observation
First, before we start any drawing. Don’t touch your pencil! We have to look and learn what important features Ingres has for his portrait drawings.
Some main features I’ve discovered are:
Very rounded contour for the face.
Huge upper eyelid
Shadow is more on the side and under the nose. The nostrils are the darkest and the most defined area of the nose.
Eyebrows are softer, defined, and rainbow-like shape.
The lips are very elegant and stylistic
The shadow around the face is very light and soft.
✨You can download the references here ⇩⇩⇩✨
If you discover any other interesting and important features, please comment! I would love to learn more!
Sketch 01 - Anna
Let’s meet Anna! Anna was the first photo reference I turned into an Ingres drawing. The picture reference I picked for this one was quite similar to the Ingres drawing. That way it’s not too alien to the drawing and won’t be as difficult to transition it into the style of Ingres. The first outline and sketch were all fine and started to add in the facial features and then add shadows. What could go wrong?
Well, it did go very wrong.

What happened was that the eyes looked too much like anime eyes. It was too large and also the harsh outline and lack of shadow around the eyes, nose, and lips. So to fix that, I used my soft brush to help soften the hard features and smooth it out. That saved it, thank goodness. But something was still bothering me. The shape of the facial features like the nose and contour of the face wasn’t quite right… I wasn’t satisfied with the results so sorry Anna—time to move on to sketch #2.
Sketch 02 - Tania
Let’s call her Tania, for sketch #2. So you must be wondering how she turned out. Well…The sketch was fine because this time I made sure to pay attention to the “Form” and “Proportions”. I had to deviate and change the form a bit but remember the “soft features and rounded outline of the face, big huge eyelids and dining the eyebrows and soft shading and elegant lips.
As I added the shadows in and I was like “Ok things should be alright this time.” Learned from my previous lesson with Anna. But something was still bothering me. The nose had no more issues… But it’s the eyes again! THE EYES! AH!
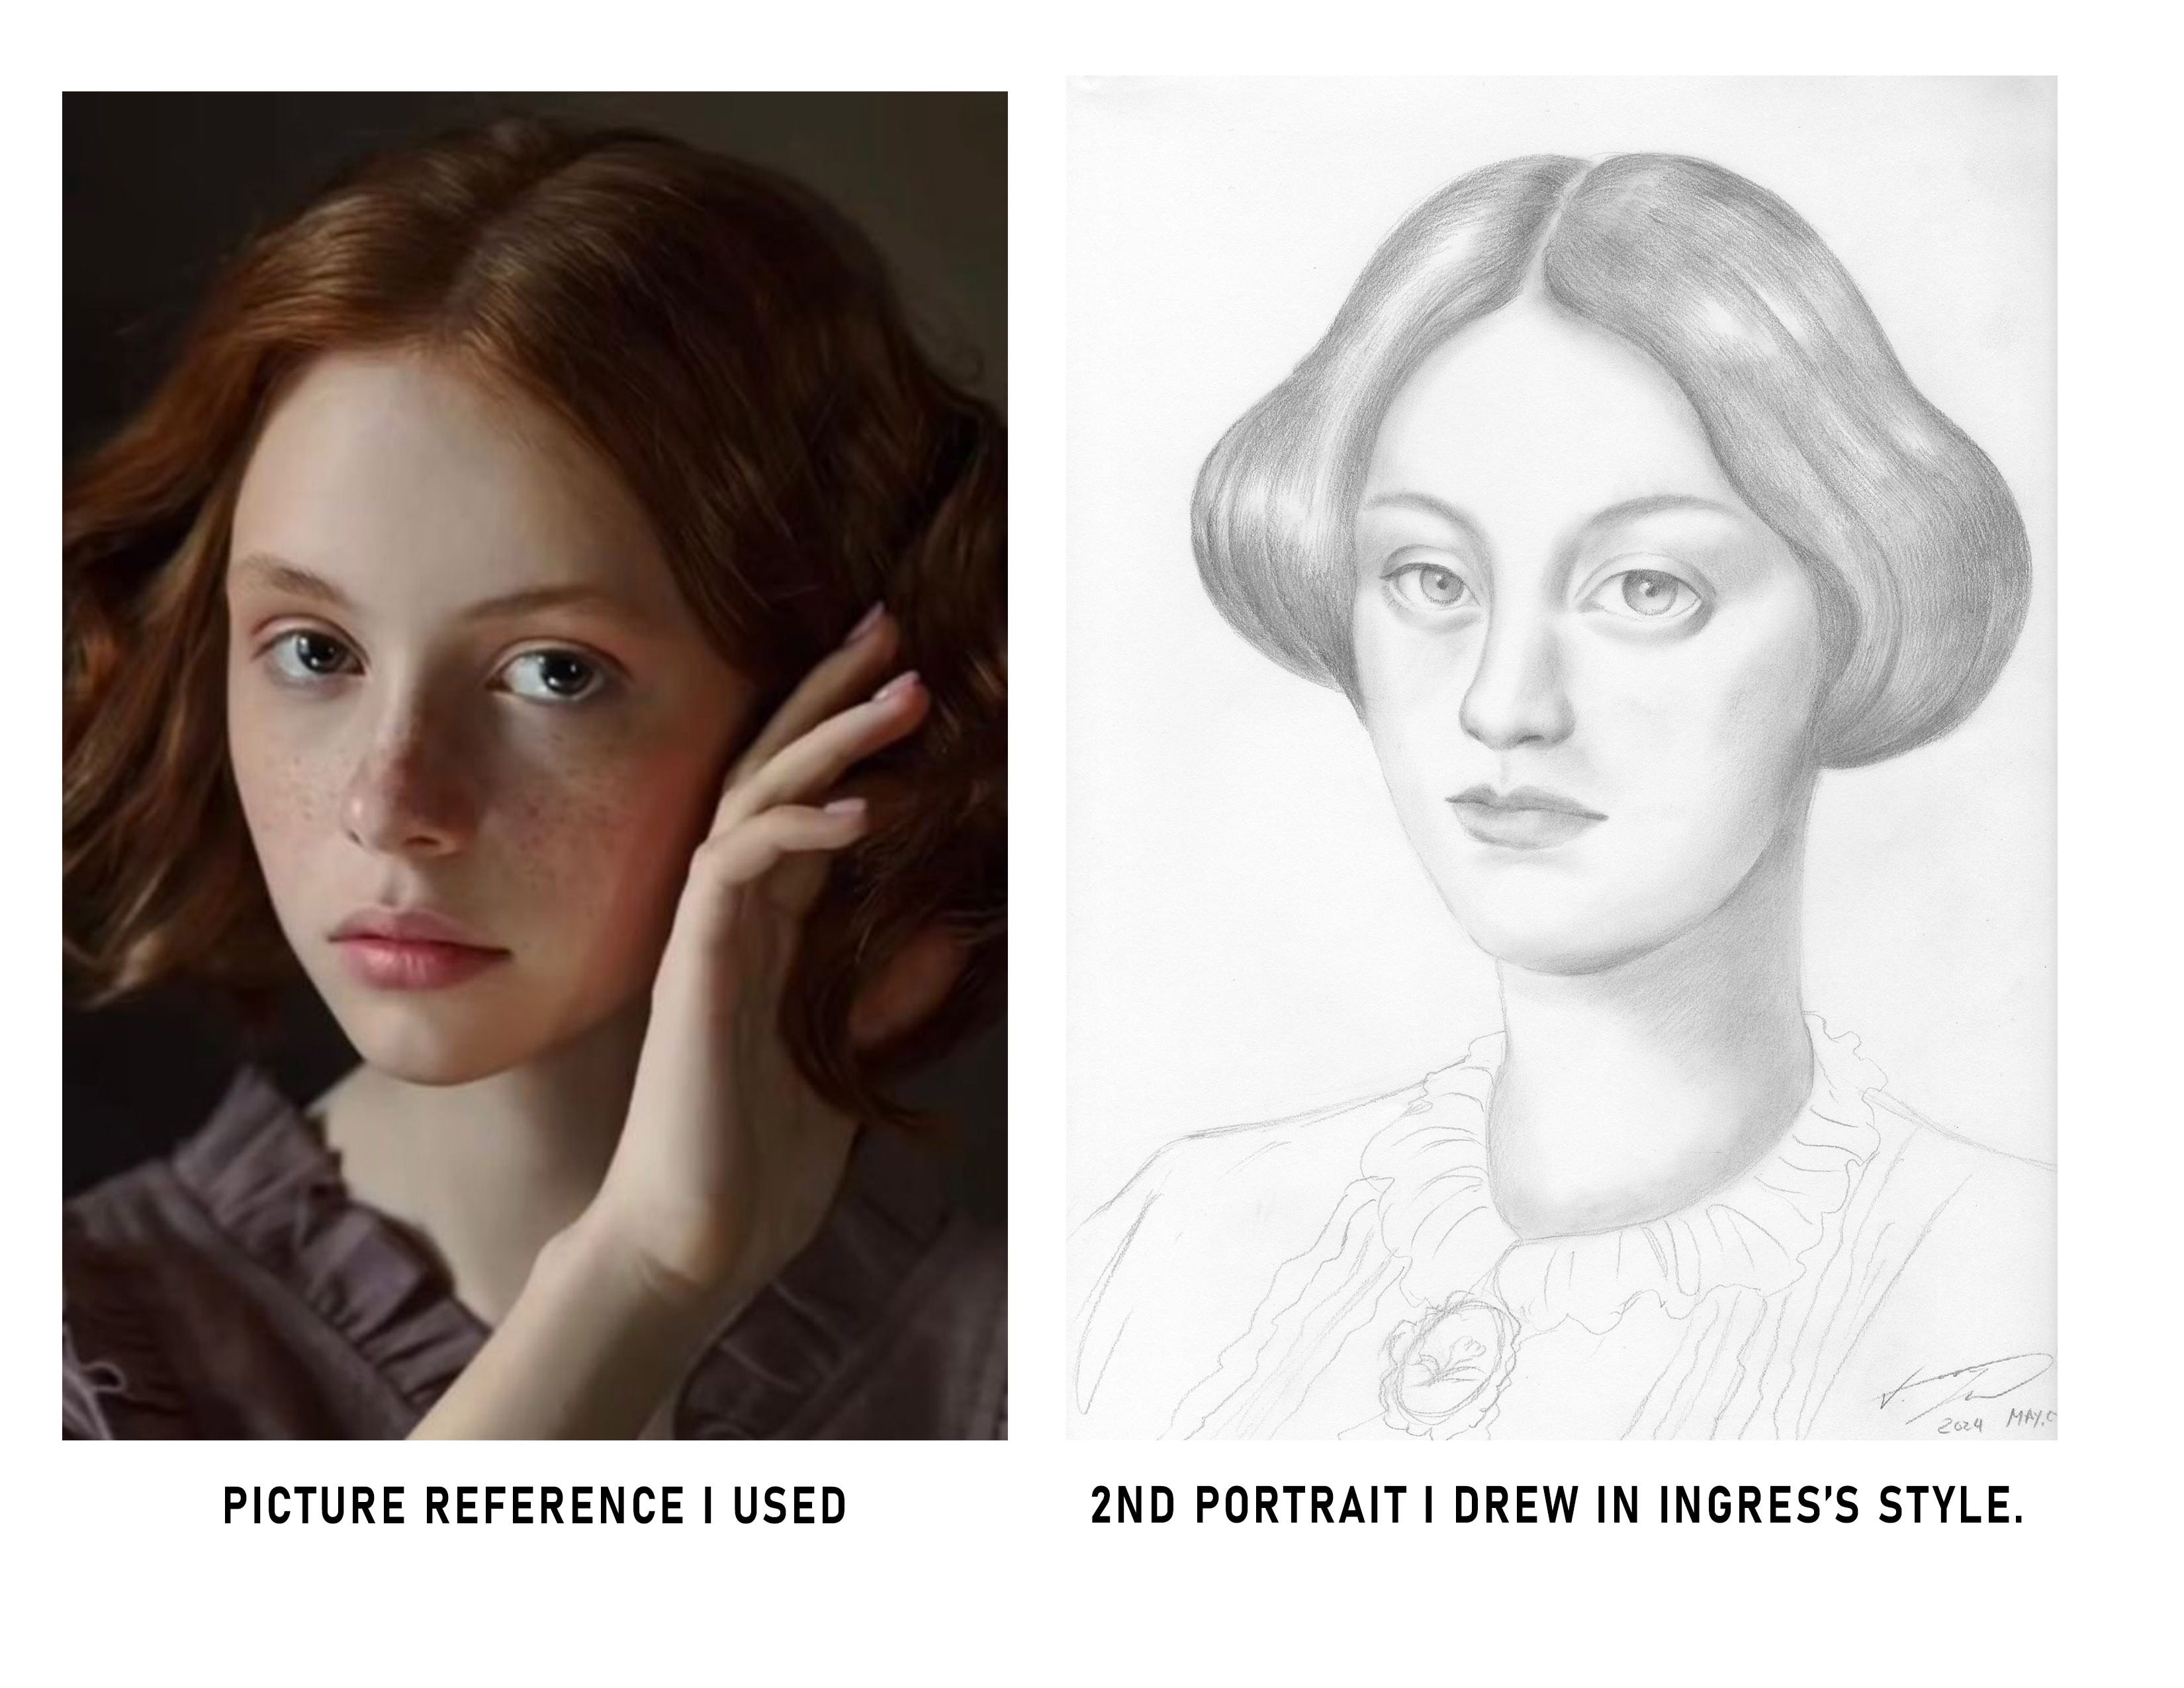
They’re just too… Clean.
What I mean by clean is too sharp. Ingres's eyes have soften features, also I think I still made the eyes way too big. Hence “Anime-like” eyes and features.
Ok, time for the next sketch! Let’s move on and try again!
Sketch 03 - Gina
Next up is Gina! 3rd time’s the charm! This one turned out even better than the other two. I made sure to make the face more rounded and soften the contours. I also made sure the soft shading was applied around the eyes. Not too sharp like Tania. But also not losing the features and likeness of the photo reference.
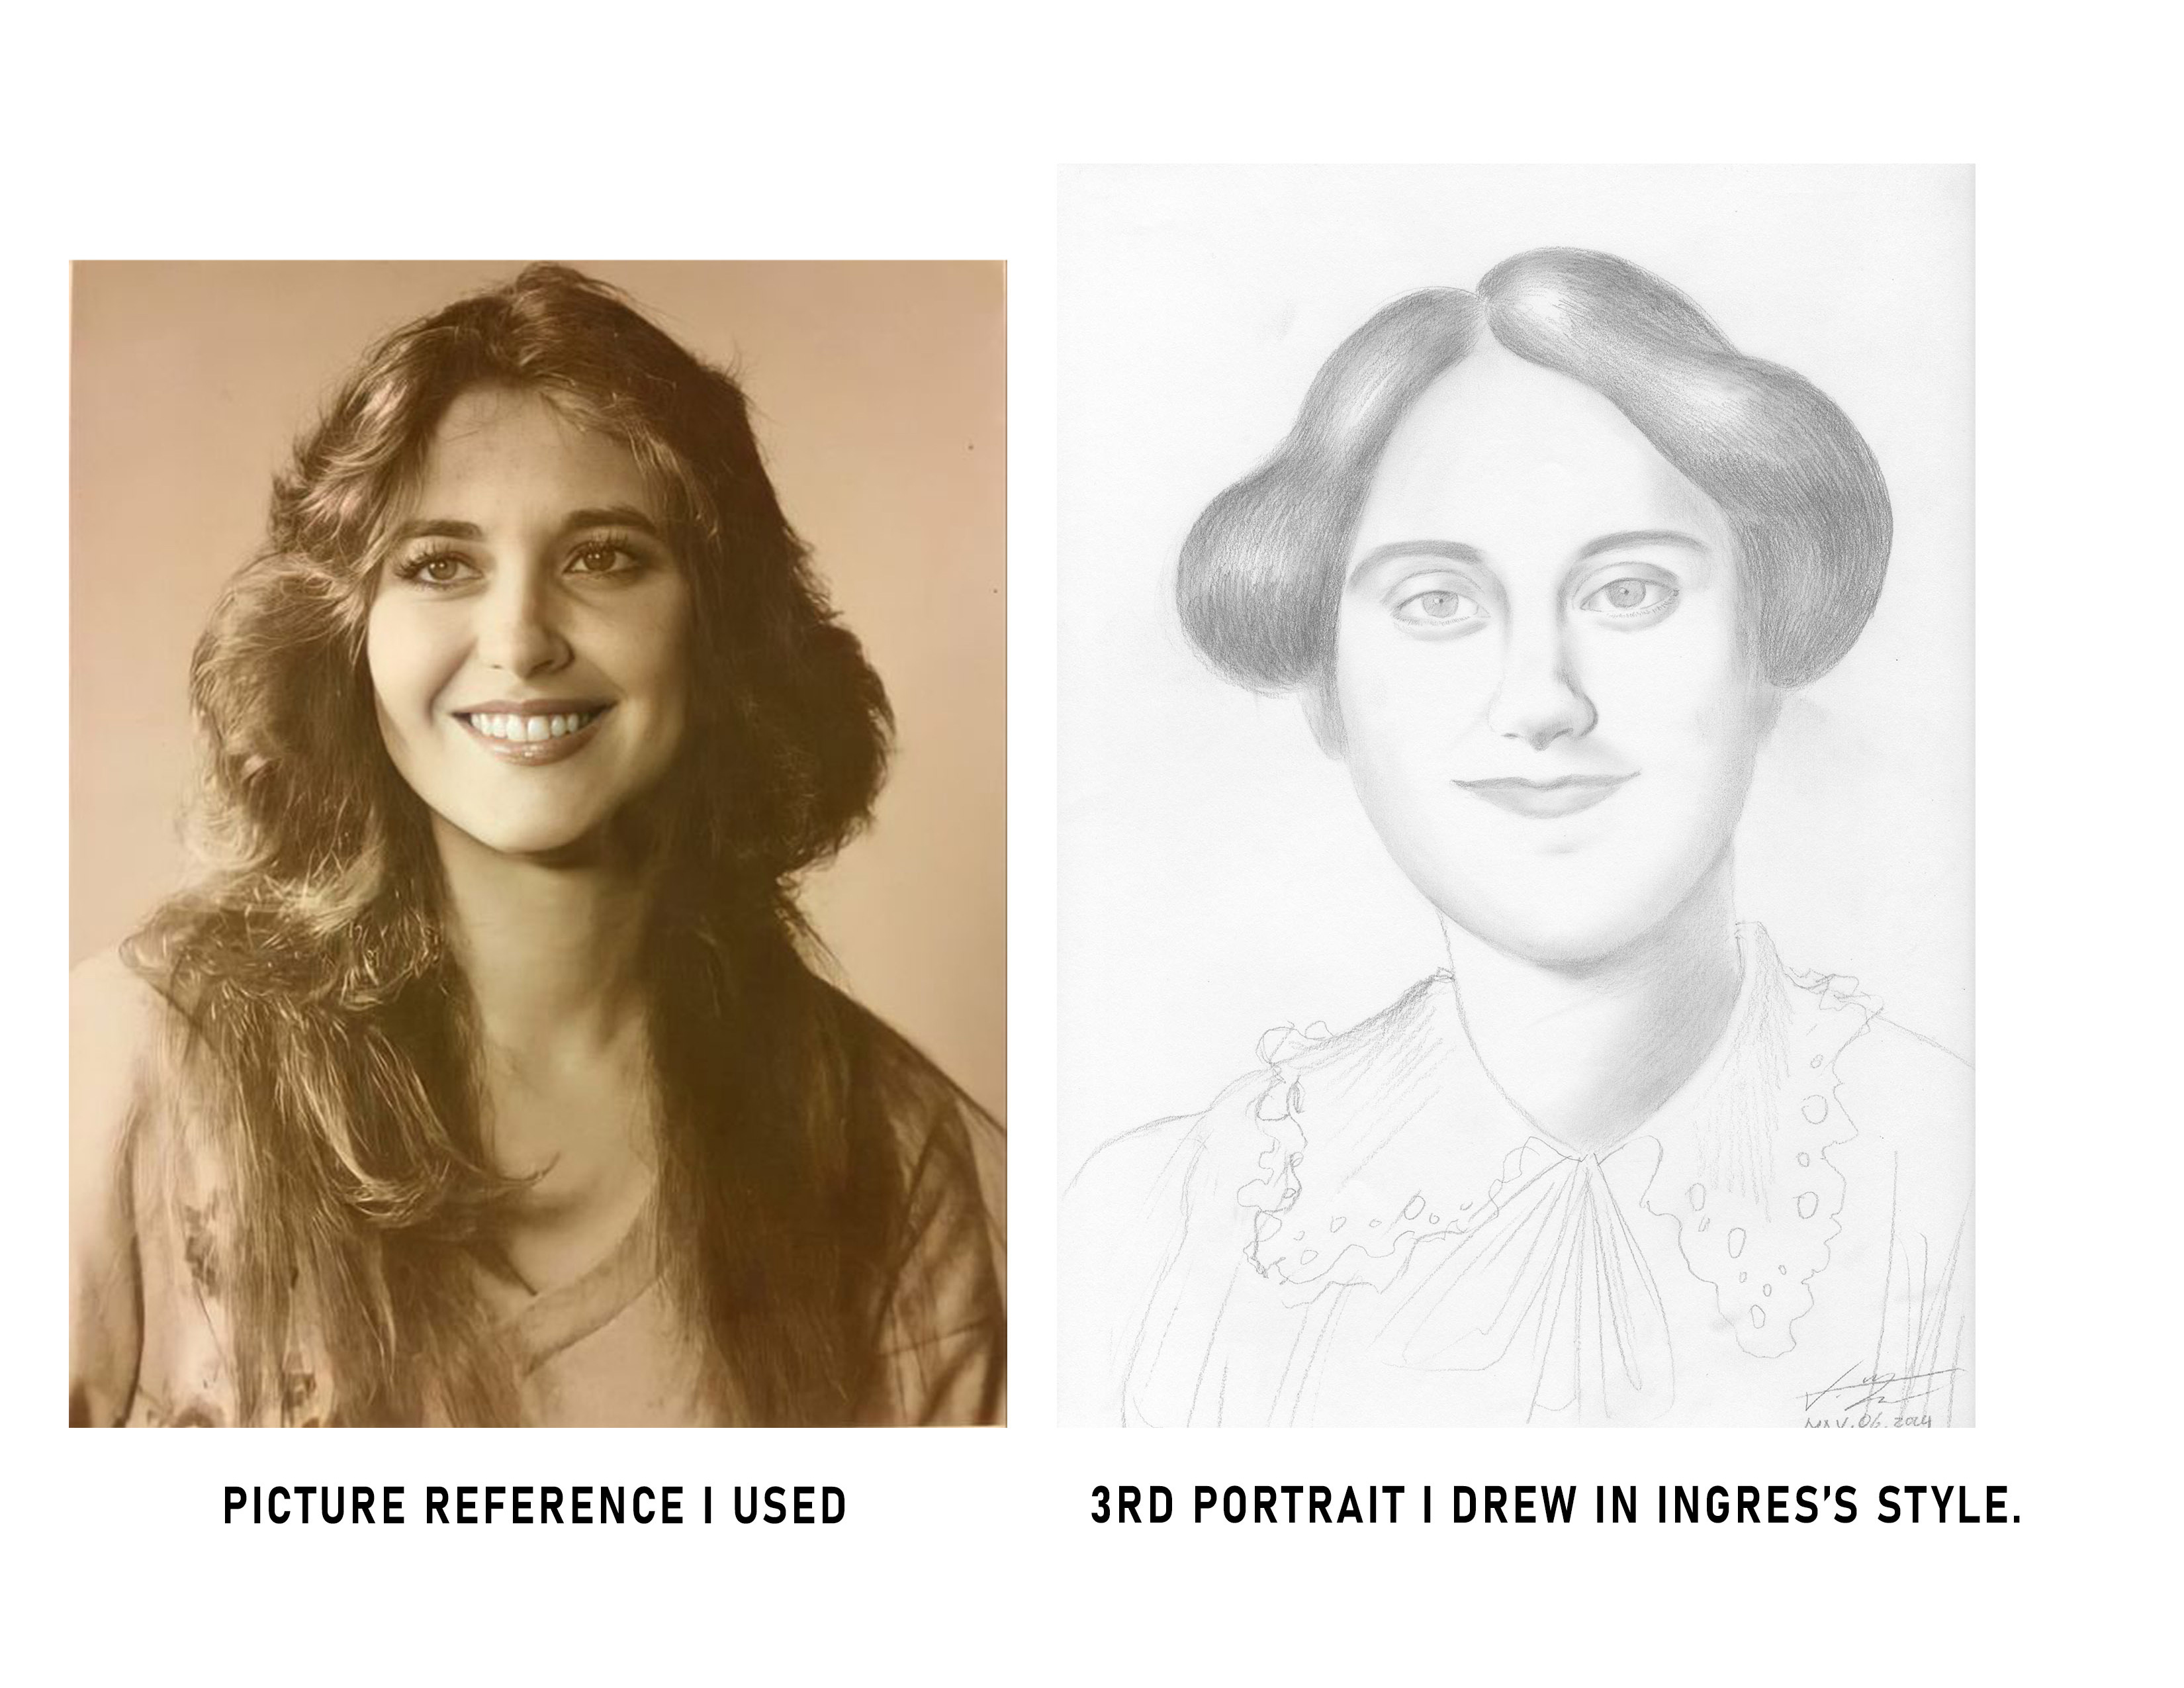
Eyebrows are also a lot more curved and arched compared to the boxy rectangular shape of the picture reference. Not so much eyelashes either since It’s not a very visible feature in Ingres Drawings.
But so far we have figured out what makes it look more like an Ingres Drawing and what makes it NOT look like it. But this is for female portraits…. what about Male portraits?
We’ll find out next month’s art tutorial where I’ll share what difference it has compared to the female portraits of Ingres.
Have fun Practicing!
This week, have fun trying out this art tutorial on how to turn any picture reference into an Ingres portrait drawing. Feel free to comment and share your experience and what you’ve learned by drawing this new art project!
Have fun learning and exploring!
Full Art Tutorial video!
Learn more in-depth on how to turn any picture reference into an Ingres portrait drawing. Join my Student Fuzz tier on Patreon for the full art tutorial video where we’ll work on a new art project every month along with more practice assignments.

✨Click here to check out Student Fuzz Tier!✨
What did you discover?
I’m curious to see what you enjoyed the most in this art tutorial. And If you also discovered something new like methods and techniques you did to get a similar result, Please, I would love to know! (You can comment and share your thoughts below!)
Thank you for reading my new art tutorial and I hope you also get to learn and share your discoveries too!
Share this with fellow friends, family, and artists who would benefit and love learning more about art! On social media, email, or text. Thanks for reading!
PS Feel free to watch my new YouTube video about this new post! Sharing thoughts and ideas! If you like it, please like and subscribe to my YouTube channel for more videos like these!